How to Install Webuzo Control Panel on CentOS, Ubuntu and other Linux Distributions – HostNamaste
In the continuation of my previous blog post about the “Top 10 Free Open Source Web Hosting Control Panels” and “Top 5 Free Windows Open Source Web Hosting Control Panels“, this time I come up with the most requested featured VPS and Dedicated Server Control Panel Webuzo. Many of our clients has requested to add the post about how to correctly install Webuzo Free Control Panel to host websites on CentOS, Ubuntu and other Linux Distributions VPS and Dedicated Server. However before we begin, it is better to firstly get to know about what Webuzo actually is and what are features it offers.
Overview – What is Webuzo?
Requirements
- Newly installed CentOS 6.x / 7.x or Red Hat Enterprise Linux 6.x / 7.x or Scientific Linux 6.x / 7.x (x86_64) / Ubuntu LTS
- YUM / apt-get / tar / wget packages installed
- RAM – Minimum 1 GB (Recommended 2 GB for best performance)
- Disk Space – Minimum 5 GB (Recommended 10 GB for best performance)
- Open Ports – 2002, 2003, 2004, 2005, 21, 22, 25, 53, 80, 143, 443, 465, 993 and 3306 (It is recommended to keep these ports open on your server)
- Note : There should be no PHP, Apache, MySQL installed on the server
Install on CentOS and Ubuntu
Open a Shell Terminal (e.g. PuTTY) and SSH to your server. Run the following commands:
1) Download the installer to your server:
wget -N http://files.webuzo.com/install.sh

2) Change the permissions to the file to make it executable (0755)
chmod 0755 install.sh

3) Run the Webuzo Installer
./install.sh // This will install the LAMP Stack, DNS Server and FTP server along with Webuzo

OR

./install.sh --install-lamp,bind // This will install the LAMP Stack(softname -> lamp) and DNS Server (softname -> bind) along with Webuzo.

Note: softname for Apps should be comma separated.

Get list of sofnames for the Apps here:
https://api.webuzo.com/apps.php

OR

./install.sh --install=none // This will install only Webuzo without any LAMP Stack.You can later install apps from the Apps Category in the Enduser Panel.
The installation will begin immediately. It may seem that the installation has stopped, if your network speed is slow, but please let it continue. You will see something like this :
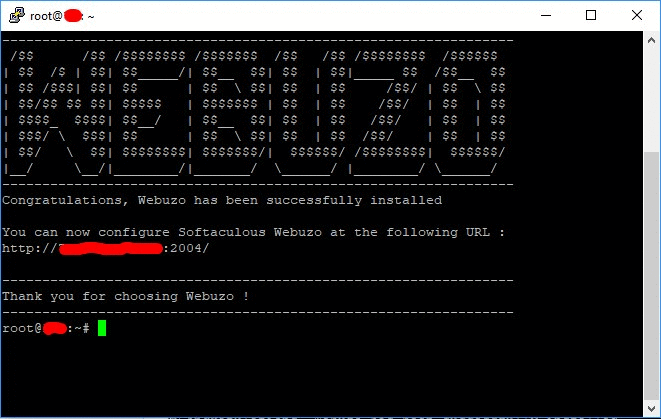
This will setup the required Web Server and other important configurations. Note : A log file of the installation process will be created – /root/webuzo-install.log
Initial Setup
After the installation is completed you will have to do the Initial Setup.
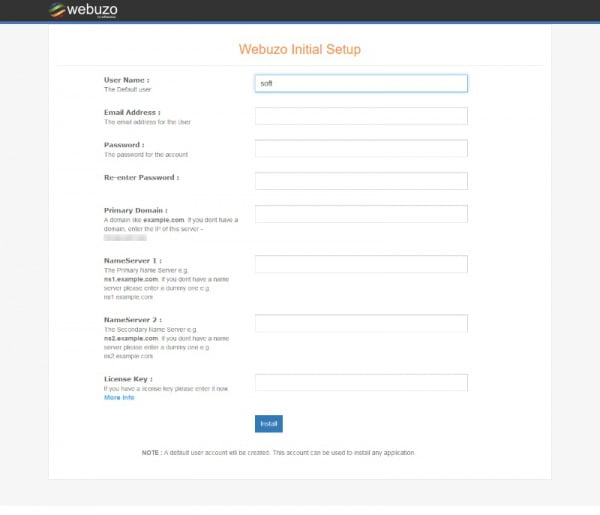
Account Information
You will need to enter the Username, Email Address and Password, etc for initially configuring Webuzo.
Domain and Nameservers
Please enter a valid Domain Name say example.com.
You will need to point your nameserver to the servers IP where you are installing Webuzo. Webuzo will ask you for the Primary Nameserver (e.g. ns1.example.com) and the Secondary Nameserver (e.g. ns2.example.com).
Use IP as Domain
If you don’t have a valid domain then you can use your servers IP as the hostname. Webuzo will also suggest to you what your server IP is. In such a case you can enter any dummy NameServer and your primary and secondary name server.
Submit the details
After you have filled in all details please submit the form.
Webuzo will start configuring the server immediately. This may take 3-4 minutes depending on your servers speed.

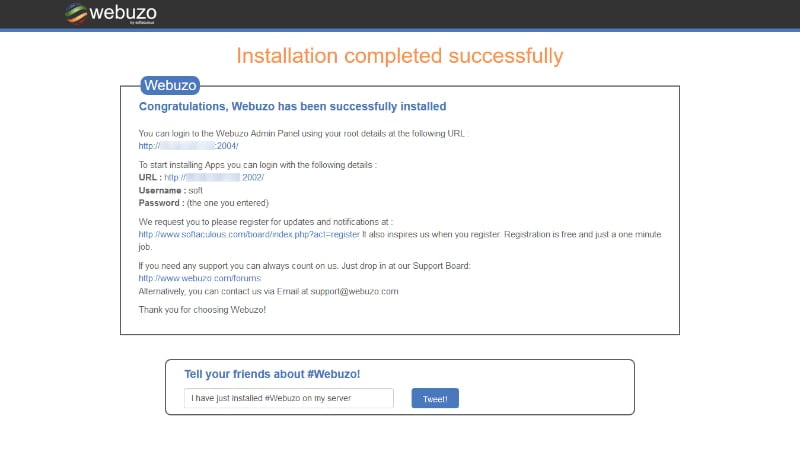
Setup Completed
You will see a screen as follows when the initial setup is finished.
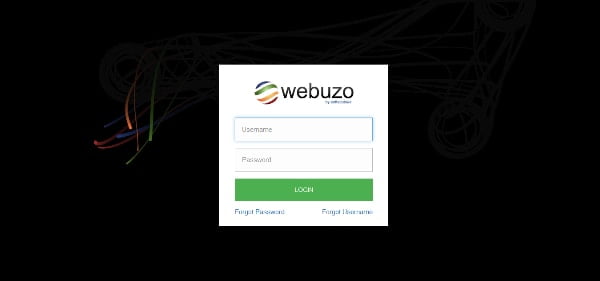
Login
Webuzo has two sections :
Admin Panel
To login to the Softaculous Webuzo Admin Panel, visit the following URL :
https:// Your-IP : 2005/
OR
https:// Your-IP : 2004/
Enduser Panel
To login to the Softaculous Webuzo Enduser Panel, visit the following URL :
https:// Your-IP : 2003/
OR
https:// Your-IP : 2002/
The username and password will be the same that you entered during the Initial Setup
Webuzo Panel
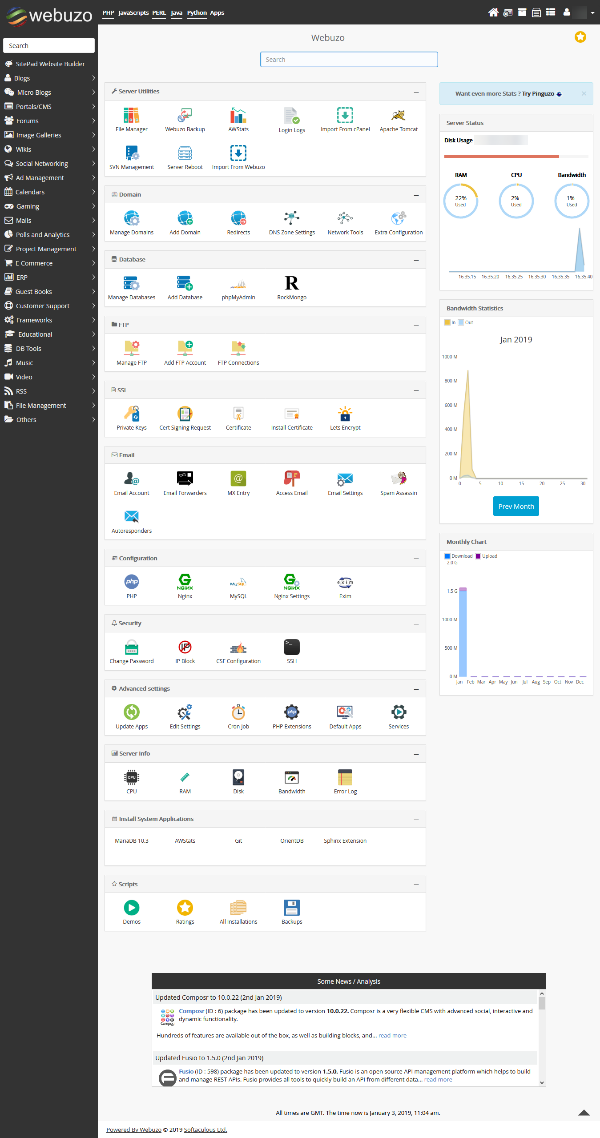
Experience the Webuzo Demo:
Webuzo Admin Demo: https://demo.webuzo.com/
Webuzo Enduser Demo: https://demo.webuzo.com/enduser/