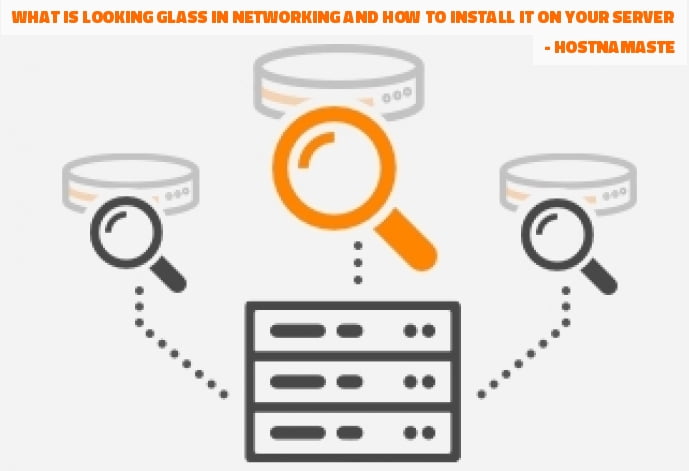
Looking Glass is an open source publicly available networking script to check the Host, Ping, Traceroute, MTR, Speed, and Latency of the VPS or Server and Network.
In this blog post, I will show you and provide the exact steps on how to install Looking Glass on your server and check the network.
Looking Glass Features
- Automated install via bash script
- IPv4 & IPv6 support
- Live output via long polling
- Multiple themes
- Rate limiting of network commands
Used SSH Commands
- host
- mtr
- mtr6 (IPv6)
- ping
- ping6 (IPv6)
- traceroute
- traceroute6 (IPv6)
Note: IPv6 commands will only work if your server has external IPv6 setup (or tunneled)
System Requirements
- PHP >= 5.3
- PHP PDO with SQLite driver (required for rate-limit)
- SSH/Terminal Access (able to install commands/functions if non-existent)
Step 1: Buy a Cheap KVM VPS
Step 2: Connect your VPS via SSH and Run the Commands
Login to your VPS or Server via SSH with root user after run the following commands, I am using CentOS 7 64bit VPS for this Blog Post:
First of all we will be updating all the existing repos and installed applications on the server after going to Install the LAMP (Linux, Apache, MySQL, PHP) which is required by Looking Glass script.
First we will be removing old packages and getting or updating to the latest version using yum on CentOS:
yum update -y
Now we will install Apache Server using the yum package:
yum install httpd -y
After we will activate Apache server:
systemctl start httpd.service
Now we will install MariaDB Database is the very popular MySQL fork which is free and open source:
yum install mariadb-server mariadb -y
After we will start the MariaDB service:
systemctl start mariadb
After we will secure MariaDB:
mysql_secure_installation
Now we will install yum-utils and enable EPEL (Extra Packages for Enterprise Linux) repository:
yum install epel-release yum-utils
After we will download and install remirepo:
yum install http://rpms.remirepo.net/enterprise/remi-release-7.rpm
After we will enable it:
yum-config-manager –enable remi-php73
Now we will install PHP:
yum install php php-common php-opcache php-mcrypt php-cli php-gd php-curl php-mysqlnd
Now we will restart the Apache Server to ensure whether it is working with the newly installed PHP or not:
systemctl restart httpd.service
Now we will install Nano Editor to edit and save the files via command line:
yum install nano
Now we will test the PHP and to do that, we need to create a phpinfo.php file and add it on the default PHP directory (/var/www/html). (You can skip this step if you want, It is not necessary to test it)
nano /var/www/html/phpinfo.php
After insert this code inside to the file and save it: (Control-O to save the file and Control-X to exit for MAC OF):
<?php phpinfo(); ?>
Now we will install GNU/Wget which is a free and open source software package for getting files using HTTP, HTTPS, and FTP Internet protocols.
yum install wget
Now we will download the Looking Glass:
wget https://github.com/telephone/LookingGlass/archive/v1.3.0.tar.gz
After we will Extract it:
tar -zxvf v1.3.0.tar.gz –strip-components 1
Now we will navigate to the LookingGlass subdirectory:
cd LookingGlass
Now we will run it:
bash configure.sh
After you will be presented with the following and asked a questions, enter y (YES) to continue:
########################################
#
# LookingGlass is a user-friendly script
# to create a functional Looking Glass
# for your network.
#
# Created by Nick Adams (telephone)
# http://iamtelephone.com
#
########################################
Do you wish to install LookingGlass? (y/n): y
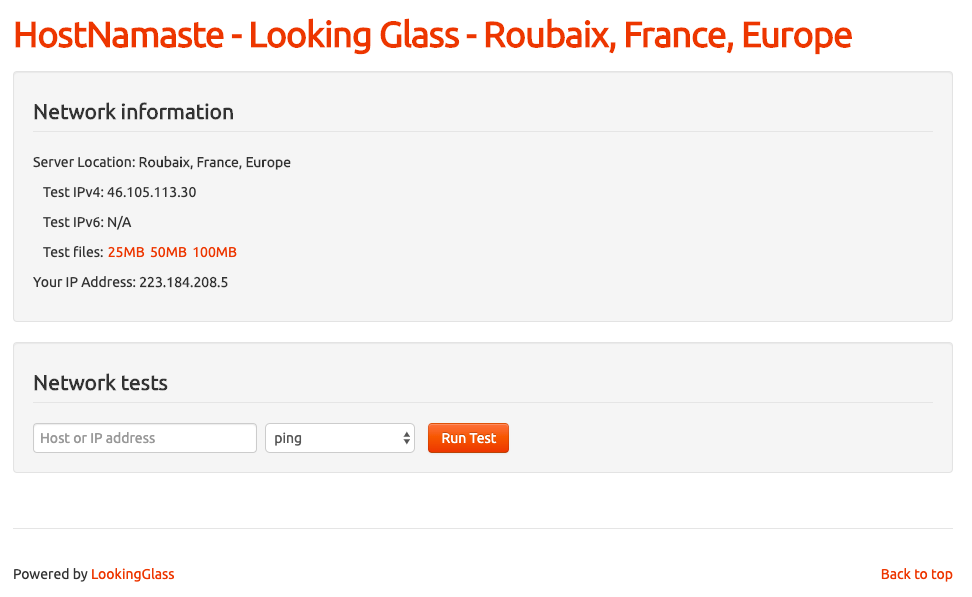
After it will take few moments to setup, and will ask you to enter the website’s name, I am entering “HostNamaste – Looking Glass – Roubaix, France, Europe”, you can enter any other if you want, i.e “Looking Glass Networking Check”:
Running setup:
Enter your website name (Header/Logo) []: HostNamaste – Looking Glass – Roubaix, France, Europe
After you will be asked to enter the URL where you want to perform and check all the networking, I have entered a demo domain name “http://example.com”, you can enter your domain or sub domain name i.e lg.yourdomain.com:
Enter the public URL to this LG (including http://) []: http://example.com
After you will be asked to enter the Server’s location, I have entered Roubaix, France, Europe, because I am testing it on France’s KVM VPS and IP address, you can enter any other as per your server’s location:
Enter the servers location []: Roubaix, France, Europe
Here you will need to enter the IPv4 Address of your VPS or Server’s:
Enter the test IPv4 address []: 46.105.113.30
Here you will need to enter the IPv6 Address of your VPS or Server’s If it is supported or simply enter it:
Enter the test IPv6 address (Re-enter every time this script is run) []: 2001:xxxx:xxxx:xxxx::xxxx:xxx
Here it will ask you enter the size of the testing file which needs to create, I have entered 25MB, 50MB and 100MB, you can enter any other i.e 10MB, 100MB, 1000MB if you want:
Enter the size of test files in MB (Example: 25MB 50MB 100MB) []: 25MB 50MB 100MB
Here it will ask you if you want to set the rate limiting of the networking which will use the PHP PDO with SQLite driver, I have said “n” NO, if you want to set the limit, you can say “y” YES and follow the steps:
Do you wish to enable rate limiting of network commands? (y/n): n
Removing old test files:
Creating new test files:
Creating 10MB test file
Creating 100MB test file
Creating 1000MB test file
Here you will be asked to choose the theme, I have entered “n” to use the default theme, you can enter “y” and will be able to see the 4 themes to decide:
Would you like to choose a different theme? (y/n): n
After you will be asked to enter the user of your webserver, I have entered “looking-glass”, you can enter any other if you want:
Creating Config.php…
Creating SQLite database…
Enter the username of your webserver (E.g. www-data): looking-glass
After you will be asked to enter the user group of your webserver, I have entered “looking-glass”, you can enter any other if you want:
Enter the user group of your webserver (E.g. www-data): looking-glass
After it will take a few moments to complete the setup:
Fixing MTR permissions…
Installation is complete
Once it is completed, you can open your server’s IP address or domain name from web browser to test it, It will look like the following:
If you are no-technical and do not want to run and install it on your own server, then you can contact third party Looking.House and they will ask you to send them your servers credentials and install their Looking Glass and provide you with the unique set of Looking Glass URLs other than the we have installed above to use and test the network.
Looking Glass FAQs:
Looking Glass is an open source publicly available networking script to check the Host, Ping, Traceroute, MTR, Speed, and Latency of the VPS or Server and Network. A Looking Glass is a piece of software running on a web server server which allows users to get a look at routing and network behavior as it originates from the remote network. A looking glass accesses a remote router and performs a host, ping, trace, or one of several show commands allowing a view of the IP and BGP route tables. Looking Glasses are most commonly used for verifying routing between the providers, and for verifying that routes are propagating correctly across the Internet. Yes, you can Install Looking Glass in any one of the Linux Distributions, I have made this blog post and used CentOS 7 64bit OS Server for the testing purpose. If you need any help or face any issues, please comment below and will help out. What is Looking Glass?
What is Looking Glass Software?
Can I Install Looking Glass on any Linux Distributions?
Reference Websites:
– https://github.com/telephone/LookingGlass
– Blog Post is Executed on KVM VPS from HostNamaste
If you ever run into any issues with your OpenVZ VPS or KVM VPS, feel free to reach out to us and we will be more than happy to fix the problem for you. It’s an included service in our 24/7/365 via technical support and VPS management.


Amazing and great in depth informative looking glass post.
Thanks for the appreciation, Jake :)
I don’t even know how I ended up here, but I thought this post was good. I do not know who you are but definitely you’re going to a famous blogger if you aren’t already ;) Cheers!
Thanks for the appreciation, Karissa :)