WordPress is one of the best Content Management Systems available in the market. It allows users to easily set up flexible blogs and websites with MySQL as the backend and PHP processing the dynamic pages of the website. WordPress CMS has seen a good rate of adoption and is a great choice for getting your websites on the search engine and running them quickly.
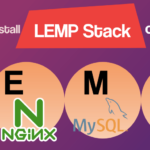
There are many ways of installing WordPress including the one using LAMP or LEMP stack. This is one of the most highly used methods. Its impressive features and extensive plugin framework and theme systems allows site owners and developers to enjoy its simple and powerful publishing tools.
In this guide, you will learn how to install WordPress instances set up on Ubuntu.
Prerequisites
Before you start, you need to complete some important steps on the server.
You need to be a non-root user using your sudo privileges.
Login to your server as root or as a user with root privilege (sudo)
To check your hostname, run the following code:
hostname
hostname -f
The first code will convey your short hostname and the second states your fully qualified domain name (FQDN).
You need to configure LAMP or LEMP Stack.
How To Install WordPress on Ubuntu Apache Server
The following steps will help you to install WordPress on Ubuntu.
Step 1): Install MySQL database
WordPress is a relational database used to manage and store site and the user information. With MySQL installed, you can fulfil this functionality. You need to make a database and a user for WordPress to work with.
Set up MySQL database for WordPress.
Follow these steps:
Log in to your MySQL command line as a root (administrative) user by using the command:
mysql -u root -p
You will be asked for the password you used to set your MySQL root account.
Now, you need to create a separate database that WordPress can control. You can call it anything you want. Here, in this example, we use the name WordPress. Enter the command:
CREATE DATABASE wordpress;
All SQL statements must end in semi-colon. Next, you need to create a separate MySQL user account that will only be used to operate the database. Assign a user name to it and a password. You will have to replace the username and password when you create your own account. Use the command:
CREATE USER wpuser@localhost IDENTIFIED BY 'password';
You need to grant the user access to the database. Use the command:
GRANT ALL PRIVILEGES ON wordpress.* TO wpuser@localhost;
Now, you need to remove the previous MySQL instances to force the new privilege changes made.
FLUSH PRIVILEGES;
Exit MySQL database using command:
exit
Step 2) Download WordPress
You have to download WordPress software from the website. Follow these steps:
You need to create a directory called src under your website’s directory, to store the fresh WordPress files. Enter the command:
sudo mkdir /var/www/html/example.com/src/
cd /var/www/html/example.com/src/
Here, var/www/html/example.com/ is used as an example. You can create your own home directory.
Set the user of your web server as the owner of your site’s home directory.
sudo chown -R www-data:www-data /var/www/html/example.com/
Now, install the latest version of WordPress and extract it using command,
sudo wget http://wordpress.org/latest.tar.gz
sudo -u www-data tar -xvf latest.tar.gz
Now, rename latest.tar.gz as WordPress followed by the date, to store a backup of the original files in case you ever install new version in the future.
sudo mv latest.tar.gz wordpress-`date "+%Y-%m-%d"`.tar.gz
Next, create a public directory to be the root directory for WordPress. This means that everyone will be able to access your WordPress site. Use command
sudo mkdir /var/www/html/example.com/public_html/
sudo mv wordpress/* ../public_html/
Now, change the web server ownership to the public folder.
sudo chown -R www-data:www-data /var/www/html/example.com/public_html
Step 3) Configure WordPress
This configuration will be done on the command line of WordPress. Follow these steps:
Navigate your domain in the web browser. Fill in your details like the preferred language and click on the Let’s go button. Use the database credentials that were set when you installed MYSQL:
Once WordPress confirms the credentials, prompt to Run to Install.
Fill in all the administrator or root information. And click on install WordPress.
Now, enter your details and click on Log In.
wp-config.php) by adding the following lines:/** Bypass FTP */
define('FS_METHOD', 'direct');
mod_rewrite is enabled. Restart Apache to apply the changes.If you want to make any further changes, access the WordPress dashboard from the web interface by adding code,/wp-admin to your website address.
Now, you have successfully installed WordPress.
Step 4) Create WordPress Permalinks
Permalinks or permanent links, are URLs that are automatically created for some posts or pages in WordPress. This helps in interlinking or backlinking of posts. By default, WordPress assigns post numbers as permalinks. This means that every specific post will have a p=23 type of number associated with it. If you want permalinks to be more information, you need to make a few adjustments to Apache or Nginx, depending on the stack you used.
Follow these steps to configure permalink settings.
- Login to your WordPress admin panel by adding
/wp-adminto the URL. - Click on Settings and then navigate to Permalinks.
You can select your preferred permalink style or customize your own, using Custom Structure. Click on Save Changes.
Step 5) Configure WordPress to allow permalinks on Apache
You need to modify Apache to allow rewrites on the .htaccess overrides. You can do so by editing the virtual host file in the Directory Section.
<Directory /var/www/html/example.com/public_html>
    Options Indexes FollowSymLinks
    AllowOverride All
    Require all granted
</Directory>
Restart Apache to save the changes.
sudo systemctl restart apache2
Step 6) Configure WordPress to allow permalinks on Nginx
By default, Nginx assumes that each permalink doesn’t refer to an existing page. It, therefore, returns a server-side 404 error. You need to update the command lines in the location / { block of the virtual host file configuration. Use the code:
Step 7) Modify maximum file size upload setting to allow larger files
By default, PHP allows only web uploads under 2 megabytes. If you want to upload larger files through the web interface, configure the upload_max_filesize setting in the php.ini.
For Apache: /etc/php/7.0/apache2/php.ini
For Nginx: /etc/php/7.0/fpm/php.ini
Look for the command line:
; Maximum allowed size for uploaded files.
; http://php.net/upload-max-filesize
upload_max_filesize = 2M
Conclusion
I hope this blog post will help you to install WordPress on ubuntu easily. Let me know in the comments if you have any questions or suggestions for the post.


